Making brilliant models is not difficult. We develop our model kits in such a way that there is something there for all difficulty levels. There are models for beginners, regular hobbyists and professionals. So the first tip we can give you as a beginner is:
Each package box gives an indication (Skill level 1 through 5) as to how challenging a model is to make. We’d also recommend you consult the staff at your local hobby shop/dealer for additional guidance, and for useful accessories that can help make building easier.

Once you have decided on your first model, you can begin.
For your model to be as close as possible to the image on the package box, you’ll need a little patience and some basic knowledge. Don’t be disappointed if your first attempt at making a model does not turn out exactly as you hoped, practice definitely makes perfect!
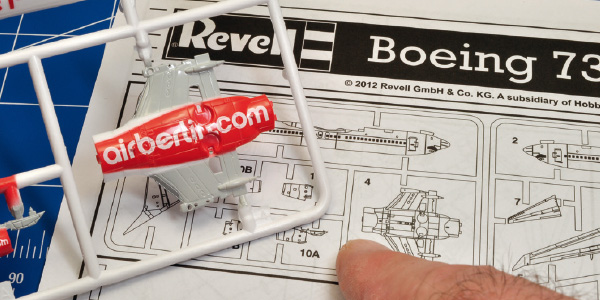
Reading instructions is not for everyone. Nevertheless, it makes sense for you to first gain an overview before you start the actual building. Read the building instructions carefully and also carefully examine the individual components on the parts trees (sprues) before you detach them. For example, sometimes parts look very similar or there are several of the same part. Therefore, you should compare the parts with the illustrations in the instructions.
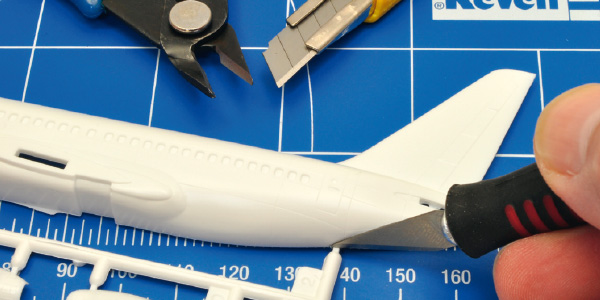
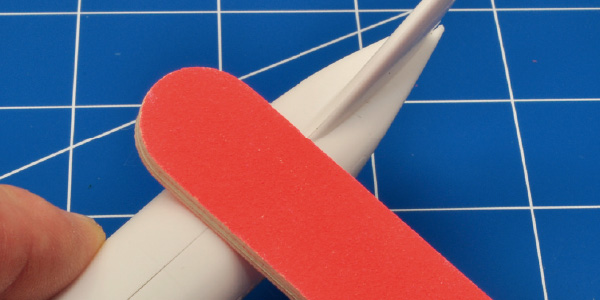
There is a big danger of damaging parts, especially small ones, if you just break them off their sprue. Save yourself the frustration and separate them with a side cutter or with a knife (on a suitable surface); then you can immediately remove residues of the waste material. We recommend using a cutting mat as this protects your work surface and keeps knife blades sharper for longer.
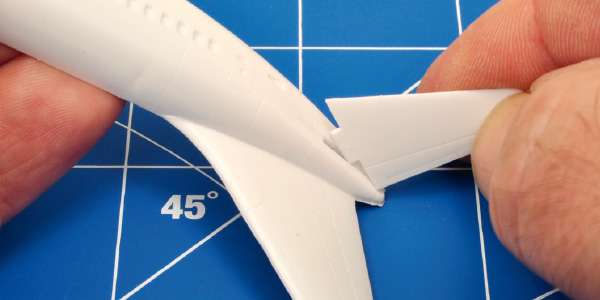
Test the accuracy of fit of the parts before you glue them together. Sometimes a small plastic residue needs to be removed with a knife or file for the parts to fit perfectly.
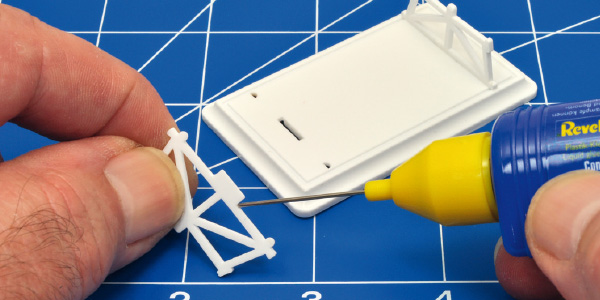
To make your model you’ll need a special plastic glue. We recommend our Contacta Professional liquid glue. Apply a little glue to the mating surfaces of the parts you are gluing and carefully bring the parts together, applying slight pressure. Small quantities are sufficient for most permanent joining – you can always add more if necessary. Should some glue go wide of the target, do not wipe it off; let it dry (3-24 hours) and then sand it smooth with files and/or fine sandpaper. Note: Always glue in a well-ventilated area.
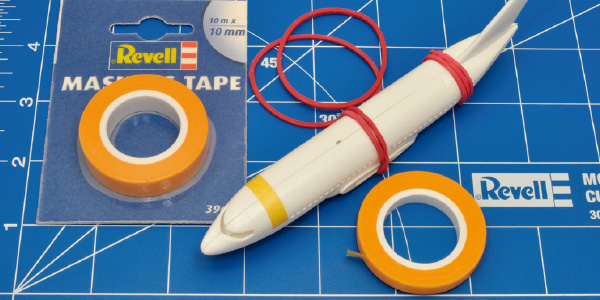
Larger components can additionally be secured with Revell Masking Tape whilst the glue hardens. Rubber bands and wooden clothes-pegs (the glue could cause plastic pegs to adhere to the model) can also be used, but be careful that they do not overstress and damage the parts you are joining.
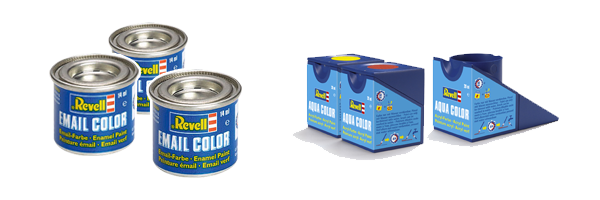
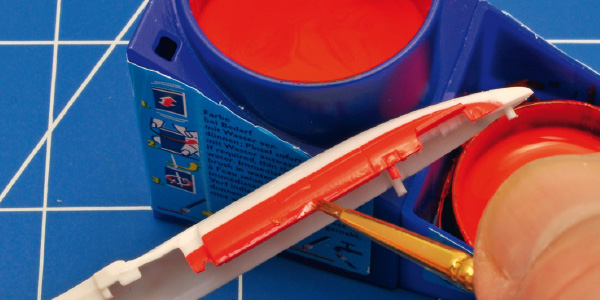
Whether you are following the instructions or producing your own creation, a model becomes a real eye catcher when it is painted. For painting your model, we recommend enamel paints such as Revell Email Color and acrylic paints such as Revell Aqua Color.
Important: Do not mix these colour types together!
Beginners are recommended to use the fast-drying, water-soluble and non-hazardous Aqua Colors. After painting, brushes can simply be washed with water. Aqua Color requires an appropriate cleaning agent such as Revell Aqua Color Clean and you need to be considerably more careful with these colours, as they contain solvents. Soft natural hair brushes such as Revell Painta Standard or artificial hair brushes such as Revell Painta Aqua in sizes 0, 2 and 4 are ideal for beginners.
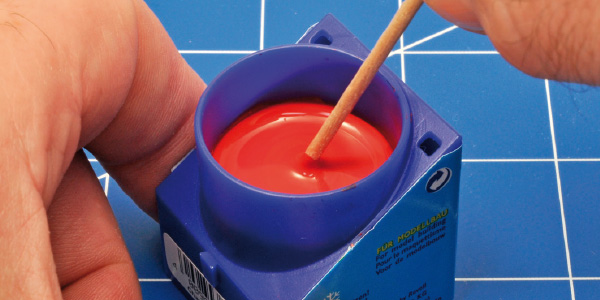
Paints must always be stirred before use to allow the contents to mix with each other. To this end, stir the paint firmly with a toothpick, a plastic stick or a small wooden spatula for approximately one minute. When painting, ensure that you keep the edge of the tin clean with a cloth so that the lid will close firmly later.
Preparation is even more important with painting than with putting the model together Give careful consideration to how you will hold the component or model without painting your fingers. Where will you place it down after you have painted it to let it dry so that the wet paint does not touch anything and can dry without hassle?
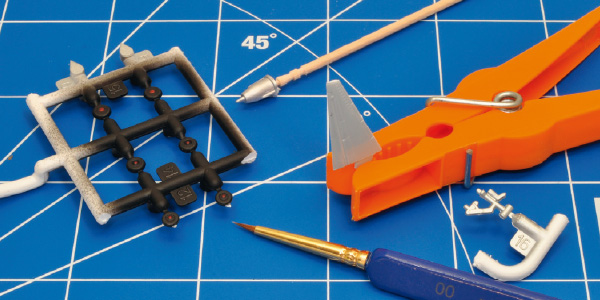
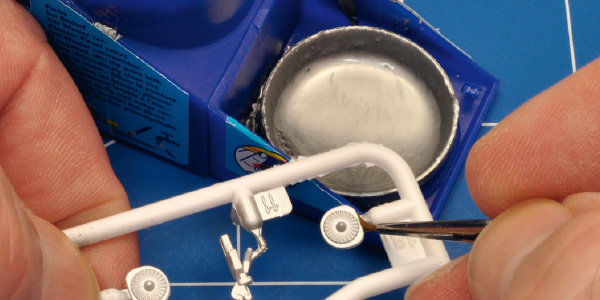
At the beginning, it is easier to paint the smaller parts on the sprue and to remove them only after they have dried – paint can be touched in after the parts are finally joined. Note: Do not apply paint to the mating surfaces where you will eventually apply glue. Additionally, you can make holders for yourself, for example using clothes-pegs, cocktail sticks pushed into foam (or similar) or you can secure your ‘handle’ onto areas that cannot be seen (such as the underside of a seat), even on a piece of waste sprue.
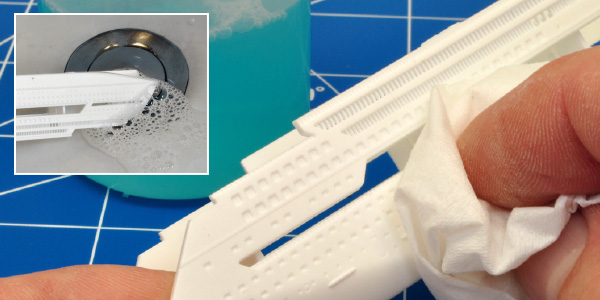
To ensure the painting is uniform and neat you should first clean all components with soapy water to remove dust, grease and fingerprint residue, rinse with clean, warm water and allow to air dry. You can also use a lint-free cloth to carefully dab away excess water.
Before you apply the brush to the model for the first time, it is advisable to practice your technique. You can do this on the interior of the components (areas that won’t be seen after final assembly), or on some waste plastic material, like a cleaned yoghurt carton.
Apply the paint using smooth, consistent strokes of the brush. Slight overlapping of the paint provides for an even surface later. Avoid going back over the area that you have already painted as this can cause the paint to drag, creating a surface that looks unrealistic. Build up colour in several lighter layers, rather than a single, heavy one, as this can cover up detail. Work from light to dark as darker colours can ‘bleed’ through lighter ones.
Metallic colours should be applied with a separate brush (to avoid metallic pigment contamination) after all other colours have been applied. Leave the painted parts to dry for a day before you built them into the model.

The application of decals gives your model an appearance that is true to the original. From national emblems on aeroplanes ship names, trim strips and registration plates on car models, decals apply the finishing touch to your model!
Apply decals in a sequence that makes building simpler. For example, it may be simpler to apply some of the decals before the model is completely assembled, to make your access easier.
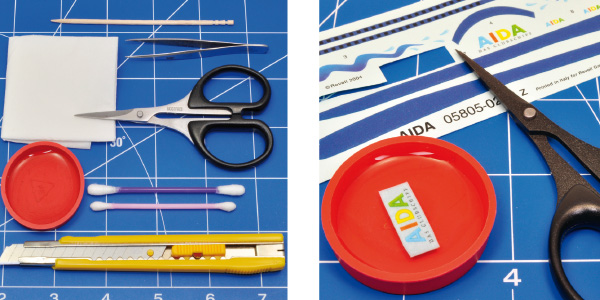
When it comes to applying decals, time, patience, a clean work area and a steady hand are especially important, as is having the right tools for the job (scissors, tweezers, toothpicks, paper towel and a small container for the water). First, cut out each decal as required using scissors.
Using tweezers, dip the decal you have cut out in a container of warm water for a few seconds and then place the wetted decal, paper side down, on a piece of clean kitchen towel. Leave to stand for approximately 20 seconds whilst the decal’s adhesive activates with the water and the decal separates from its backing paper.
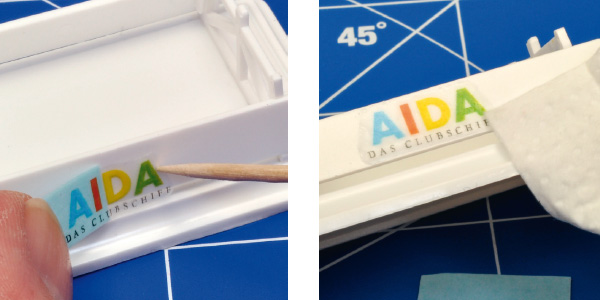
Now, (holding the backing paper with tweezers) you can slide the decal just a little bit off its backing paper and onto the model (also dampen the area with warm water) using tweezers, a toothpick or a water-moistened paint brush. Once you are happy that the decal is correctly positioned, carefully soak up any excess water with paper towel and leave the decal to fully dry. Avoid touching the decal whilst it is drying.
Attention: always check that the image is positioned correctly before you slide it off the backing paper completely so that it does not stick to your finger, crease or even tear. Carefully soak up excess water with kitchen towel.
Finished!
By attaching the last decal, you have completed your first model. You now have a unique item built just by you that you can present proudly.